How To Install A Carriage Bolt: Step-by-Step Installation Guide
May 22, 2026
In wood structure connection, metal component fixation and outdoor engineering installation, the selection and installation of fasteners directly determine the overall structural stability and long-term safety. As a dedicated anti-rotation fastener, carriage bolts are widely adopted in furniture assembly, fence construction, wooden deck installation and mechanical bracket fabrication.
Most on-site installation issues are not caused by insufficient tightening torque, but by improper installation methods that fail to match the bolt's unique structural characteristics - especially square neck embedding accuracy, pilot hole fit and uniform force transmission. Therefore, understanding the structural principles and mastering standard installation procedures is essential to achieve reliable, long-lasting connections.
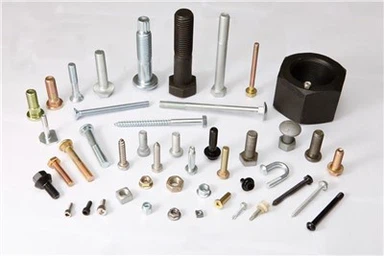
What Is a Carriage Bolt?
A carriage bolt is a specialized fastener featuring a smooth round head and a square neck, designed specifically for single-sided access installation scenarios. Its structural configuration delivers three core features:
- Smooth round head: Sits flush against the material surface after installation, eliminating sharp protrusions for improved safety and aesthetics.
- Square neck shank: Embeds into the mounting material to form a mechanical anti-rotation lock during assembly.
- Threaded body: Matches with nuts to generate stable axial clamping force for firm fixation.
The core advantage of carriage bolts lies not in higher tensile strength, but in structural optimization that enables one-sided fastening, automatic anti-rotation and flush surface finishing. This makes them ideal for structures where dual-sided operation is unavailable, including wood panel splicing, guardrail fixation and hybrid steel-wood frameworks.

Pre-Installation Preparation & Inspection
Complete basic matching inspections before formal construction to avoid subsequent structural failure and assembly defects.
1. Material Adaptation Analysis
Different base materials require targeted installation strategies:
- Softwood: Highly compressible, compatible with standard-size pilot holes.
- Hardwood: Requires high-precision pre-drilling to prevent cracking.
- Metal plates: Needs precise through-hole processing for tight fitment.
- Composite materials: Requires controlled drilling to avoid edge chipping and delamination.
2. Specification Matching Criteria
Verify three key bolt parameters to ensure full compatibility:
- Bolt diameter: Determines the required pilot hole size.
- Bolt length: Defines the maximum clamping thickness for connected components.
- Effective thread length: Decides nut engagement range and fastening reliability.
Engineering Judgment Standard: Insufficient thread engagement will directly cause connection loosening and structural failure under load.
Drilling Process: The Core of Successful Installation
Over 80% of carriage bolt installation quality depends on drilling accuracy. Improper hole processing is the leading cause of bolt spinning, material cracking and unstable fixation.
1. Standard Through-Hole Machining
- Use a drill bit matched precisely to the bolt's nominal diameter.
- Maintain vertical drilling to avoid angled holes and uneven force distribution.
- Ensure smooth inner hole walls to reduce friction and material damage.
Risk Warning: Oversized holes disable the anti-rotation function; undersized holes lead to material cracking and difficult bolt insertion.
2. Square Neck Embedding & Locking
The square neck is the core of anti-rotation performance. Complete mechanical locking must be achieved via two standard methods:
Method A: Press-Fit Embedding (General Wood Construction)
- Insert the bolt into the pre-drilled hole.
- Tap the bolt head gently to press the square neck into wood fibers for tight occlusion.
Method B: Pre-Machined Square Recess (Engineering-Grade Applications)
- Pre-fabricate standard square grooves matching the neck size.
- Achieve 100% precise embedding for zero rotation tolerance.
Engineering Judgment Standard: Anti-rotation performance depends entirely on full square neck embedding, not excessive nut tightening.
3. Countersinking Treatment for Premium Finishes
For scenarios requiring flush and aesthetic surfaces such as furniture, guardrails and decorative structures, perform shallow countersinking to sink the round bolt head flush with the material surface, delivering a smooth, scratch-free finish.
Step-by-Step Carriage Bolt Installation Process
Step 1: Positioning and Bolt Insertion
Insert the bolt from the round head side, aligning the square neck with the pre-drilled embedding area.Do not rotate the bolt during insertion, as this will damage the material occlusion structure and weaken anti-rotation performance.
Step 2: Verify Anti-Rotation Locking
After preliminary placement, check the locking effect: confirm the bolt is fully fixed without spinning. If rotation still occurs, rework the hole position or square neck embedding structure before proceeding.
Step 3: Install Washers and Nuts
Select matched accessories based on application scenarios to optimize stress dispersion and stability:
- General wood structures: Flat washer for uniform pressure distribution.
- Load-bearing structures: Combination of flat washer and spring lock washer for anti-loosening protection.
- Outdoor corrosive environments: Full stainless steel washer and nut assembly for enhanced durability.
Note: The primary function of washers is to disperse concentrated stress and protect material surfaces, rather than simple anti-loosening.
Step 4: Phased Gradual Tightening
A three-stage tightening method is recommended to avoid material damage and structural offset:
- Initial positioning: Apply mild force to establish basic clamping alignment.
- Structural embedding: Allow the square neck to fully sink and lock into the material.
- Final pre-tightening: Reach the standard design clamping force for stable fixation.
- Prohibited Operation: One-time high-force tightening easily causes wood cracking, thread damage and structural misalignment.
Common Installation Problems, Causes and Solutions
|
Common Problems |
Root Causes |
Solutions |
|
Bolt spinning during tightening |
Incomplete square neck embedding; oversized pilot hole |
Recalibrate hole positioning; optimize drilling precision and re-embed the square neck |
|
Wood cracking |
Missing pre-drilled pilot holes; unreasonable hole diameter design |
Adopt staged reaming process; select bolt specifications matching the material hardness |
|
Long-term connection loosening |
No anti-loosening configuration; wood material creep deformation |
Install lock washers; apply thread-locking adhesive for enhanced stability |
|
Force offset and uneven stress |
Offset hole position; uneven mounting surface |
Use guided drilling tools; add gaskets to level the force-bearing surface |
Conclusion
The reliability of carriage bolt connections does not rely solely on high tightening torque, but on three core structural logics: complete mechanical locking of the square neck, precise matching between holes and materials, and uniform axial force transmission. Only when all three conditions are met can the bolt deliver stable, long-term and high-reliability fastening performance.
If you need high-precision, consistent carriage bolts with stable batch supply and diverse material options (carbon steel, galvanized steel, stainless steel), Jinrui provides full industrial-standard fastener solutions. We help your projects achieve optimal structural strength, safety and long-term stability.